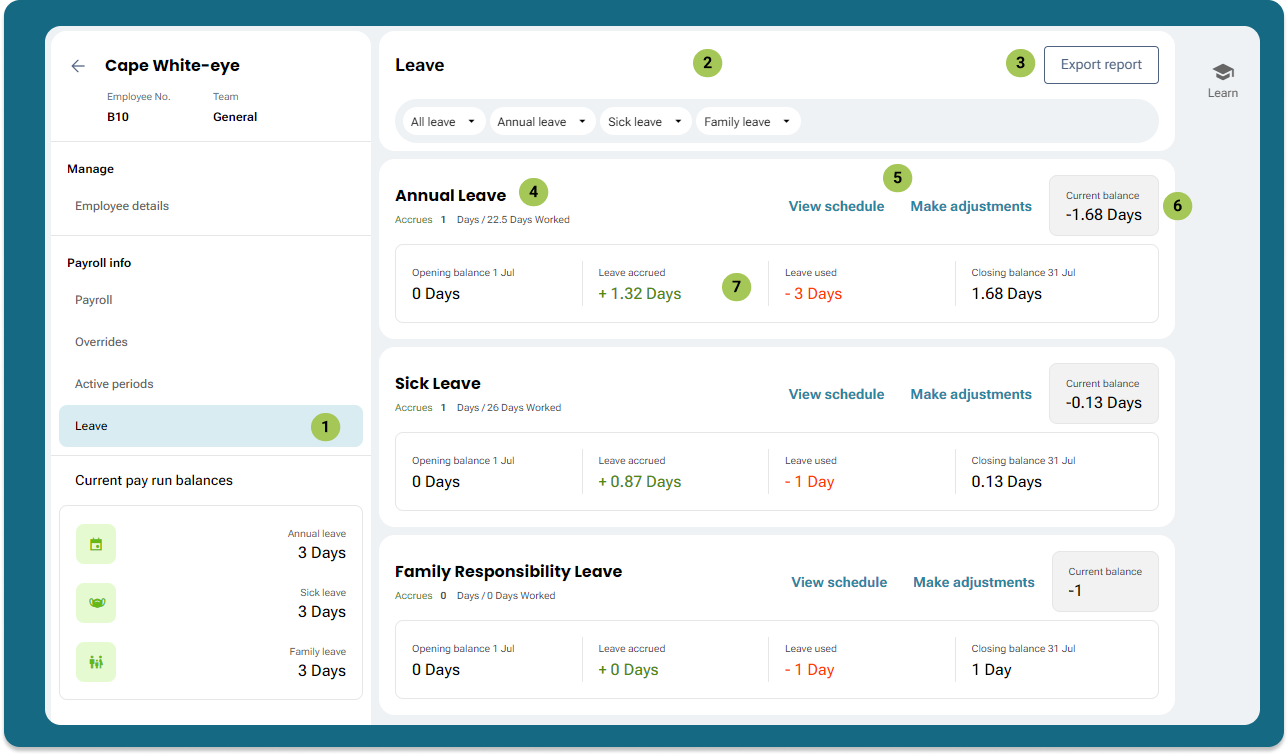
Payroll view for an employee
Payroll view for an employee
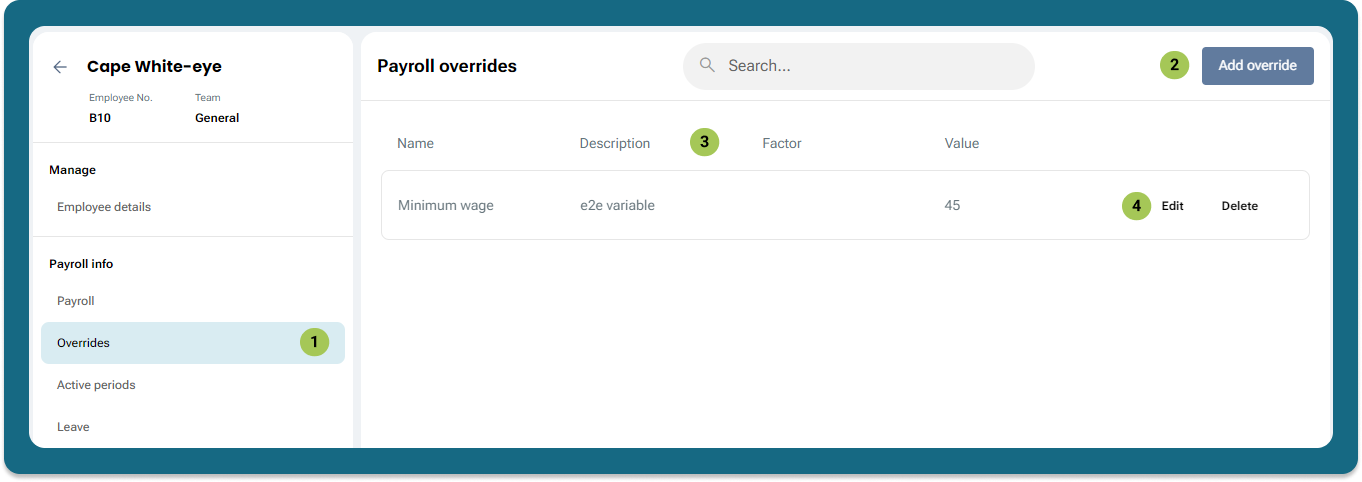

Employee overrides - add scheduled override

Provide scheduled override details
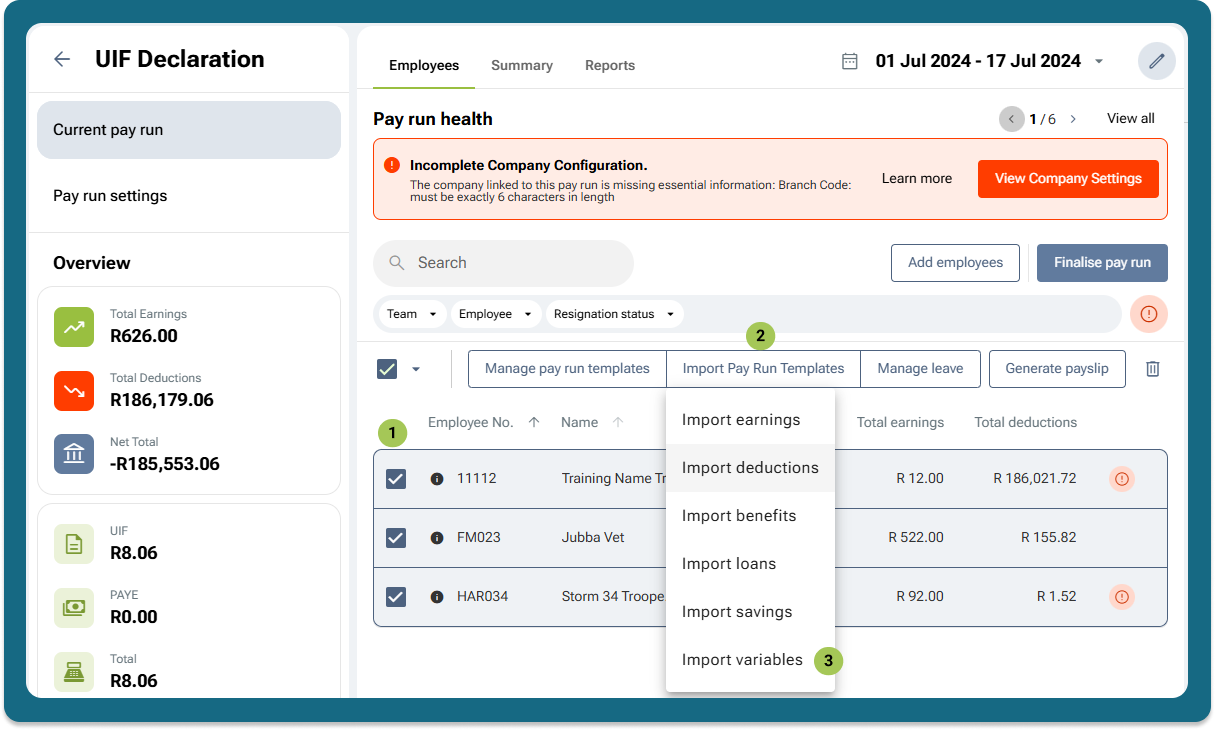
Import system rates for one or more employees

Add scheduled rate overrides in bulk from the pay run
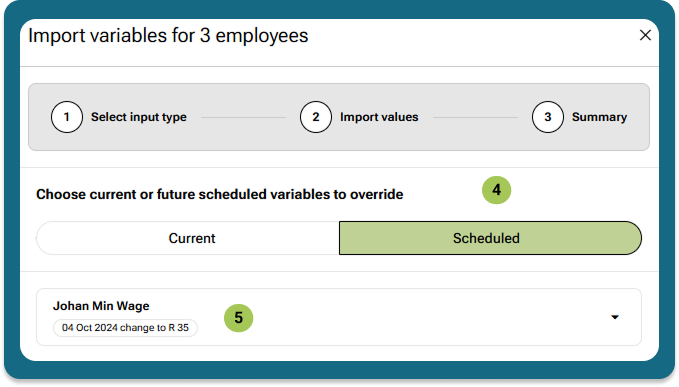
Select scheduled rate

Scheduled rate details

Employee active periods
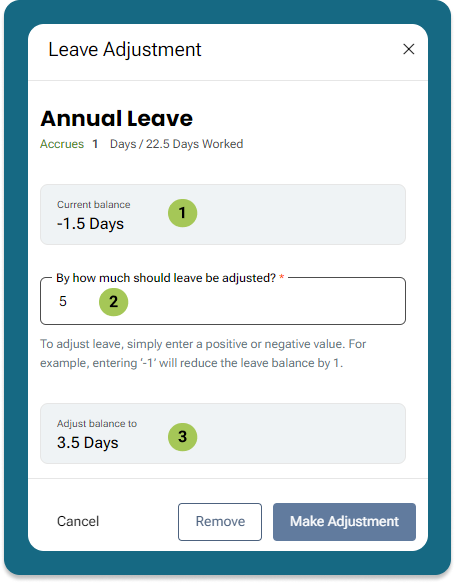
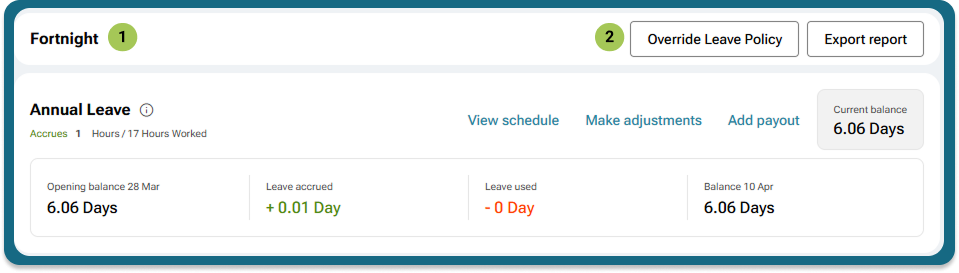
Leave Adjustment
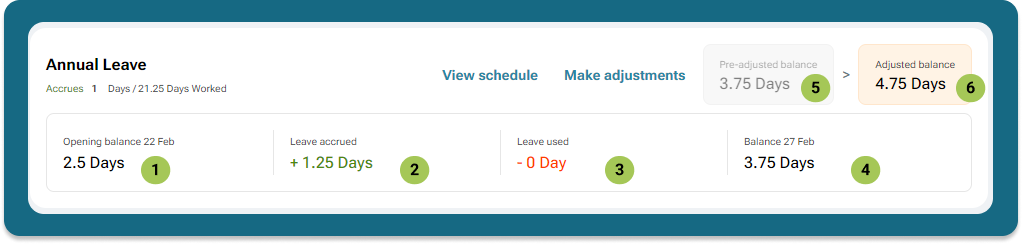
After adjusting a leave balance
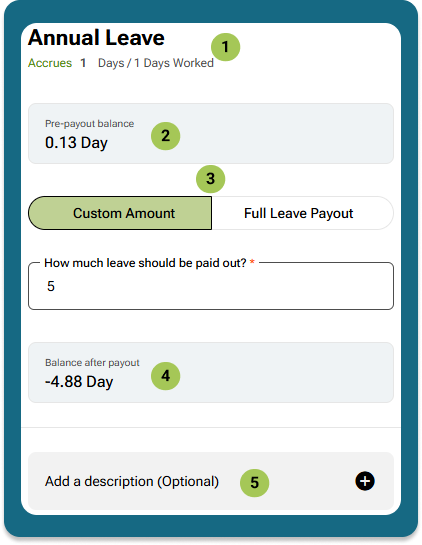
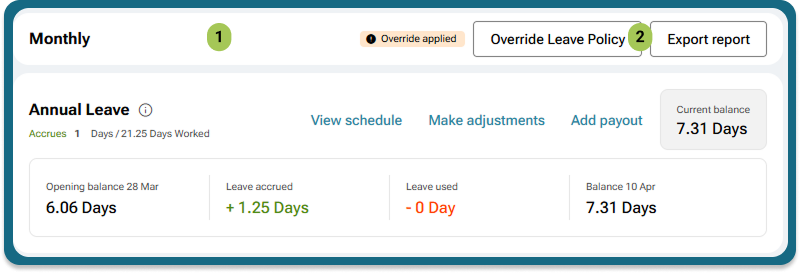
Leave payout
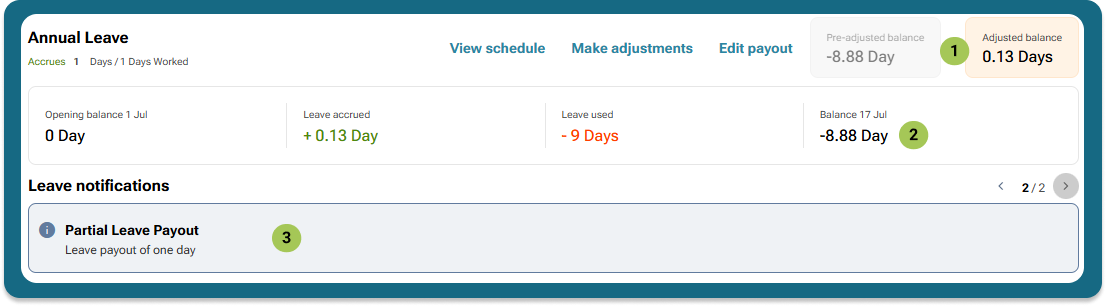
Leave balance after a payout

Leave schedule